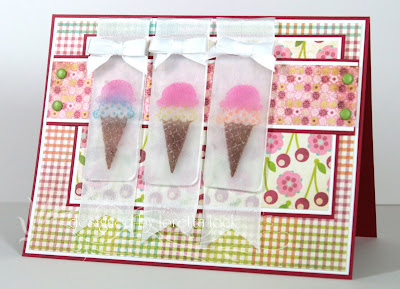
Here's my card for this wonderful challenge;

A little shrink plastic info...
Did you know that shrink plastic behaves as though it has a grain like fabric? The original size of these were the same, but the one that is shorter than the others was cut horizontally whereas the other pieces were cut vertically. A bit of a bug a boo there.
Rust from a cookie sheet will become permanently fused with shrink plastic in the shrink process.
Shrink plastic can be cut with nesties. I got the idea to try it from Tosh's project here. This little fact has officially blown my crafting world wide open!!!
And in other news...
I just got the bow easy tool. It arrived in my mail today, and it is the best little tool evah!!! If you don't have it, kick yourself in the hiney and get one! It's cheap and marvellous!
stamps; critters 'n treats (basic grey)
paper; lemonade (basic grey), coconut swirl, cranberry (bazzill)
ink; brilliance pigment inks (tsukineko)
accessories; 1" silk ribbon (may arts), white satin (offray), parakeet brads (bazzill), 1/2" corner rounder (zutter)
-------------------------------------------------------------------------------------------------
The ladies at i {heart} papers are doing a challenge and there is more info on the blog. It's a fun one, and I really was challenged! It goes something like this;
1-2-3 challenge;
1 sentiment
2 embellishments
3 layers
I was challenged on all fronts. However, I think I came up with quite a cutie;

I used a sentiment from Hugs from a Bug and used my octagon nesties to cut down into my layers ( I may break my arm patting myself on the back for that!). I used white satin ribbon (embellishment #1) and a prolific amount of pink rhinestones (embellishment #2). The pink and designer paper layers are from Lemonade by Basic Grey.
Be sure to check out what the other girls did with this challenge!
Carolyn, Cathleen, Deb, Gretchen, Lynn, Megan, Tracy, Judy, Tammy, Lori, Kate and Kendra
-------------------------------------------------------------------------------------------------
And now for a tutorial that I have been asked for a few times. I found these cream chalks and was a little intimidated to use them. I discovered that they are quite similar to cream based make-up. It feels creamy, but goes on dry. I have no idea how that works, but I'm happy for it!
I used this technique on a card I did for the Our Daily Bread designs August release of Happy Birthday.

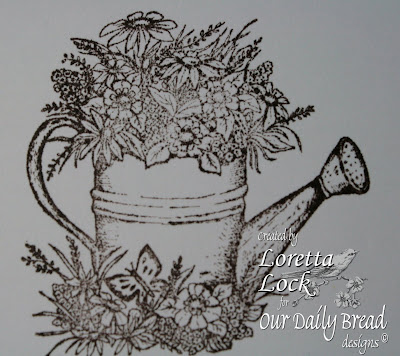
For this technique, I used the prismacolour pencils and metallic cream chalks pictured here. Don’t be limited by my colour choices here. This technique works so well with many open images, like the watering can from the August release, ‘Happy Birthday’.

I stamped the watering can with Adirondack Espresso Ink, but I have found that many inks work well with prismacolour pencils. My favourites though are Adirondack and Distress Inks.

I lay down a light layer of my darkest colour first. I emphasize ‘light’ layer. ;) Having some of the white of the paper show through is a good thing for this technique.

Next, I colour a little further into the open space lightly with my mid tone colour as well as going over the dark layer, to blend the colours.

Finally, I finish filling the watering can with the lightest or accent colour. As before, I colour over the previous layers of colour. At this point, it really isn’t a pretty thing! However, the magic happens with the next step.

I have applied the cream chalk on the body of the watering can to show how the chalk fills in the white spaces and blends the prismacolours. I take up a little chalk on the end of the blending tool and rub it on in little circles to thoroughly blend the layers of colour. The metallic cream chalk has a very subtle metallic sheen to it that is very appealing on metallic objects, like the watering can. However, I do have visions of it on flowers, butterflies, and many other images where a little bling is a good thing!

Here, the watering can is completely coloured. I used the rust coloured chalk pictured to the left of the stamped image.

To finish the look on the watering can, I did a little highlighting with a white gel pen. COlouring with prismacolours and blending with cream chalk is a very forgiving technique that I have found covers many ‘wish I hadn’t done thats.’
And here is the finished card;

stamps; happy birthday (ODBD)
paper; coconut swirl, capetown (bazzill), Ancestry (K&Co)
ink; antique linen, tea dye, vintage photo distress ink, adirondack espresso (ranger)
accessories; cross charm (blue moon beads), silver brads (making memories), pink ribbon (american elements), ivory scallop and brown satin ribbon (may arts), adhesive pearls (kaiser), long mega deckle rectangles, nesties (spellbinders), prismacolours

21 comments:
Your challenge card is lovely! And your tutorial is awesome too!
Gorgeous, Loretta!! Love the first one, but the second is absolutely stunning with the wonderful coloring and tutorial!!! Thanks for sharing!!!
Wow Loretta, love your IHP card and the second one is just stunning!
Wow what a lovely card and so beautiful coloring!!! Love it!
Hugs
I love the paper you chose for your cute little bee card and the way you cut the sentiment out to match! Adorable!
Your tutorial card is amazing, and the I loved seeing how you did it! TFS! {{hugs}}
I love your tutorial!! It's awesome. Both of your cards are GREAT!
What a darling little bee card - I love how you did the sentiment!
AWESOME tutorial -- and a beautiful result!
Cute card for the challenge! And your ODBD card is beautiful!
Oh, I am just flabergasted at this STUNNING card Loretta! It's sooo beautiful :) LOVE that set, your coloring and sponging around the sentiment is so perfect!! WOW. Thanks for sharing your technique with us =0) LOVE IT!
Beautiful Loretta! And a great tutorial, too. Where did you find those chalks? I've never seen them.
I love your challenge card...what a great job you did with such limitations! :)
Wow! Outstanding coloring! And I love your three layer card too. Those brads in the scallops are very cool.
These are all amazing, Loretta! Thank you for the wonderful tutorial! You are so very talented!!!
Fabulous!! I love the tutorial too!
These are all so wonderful, Loretta...love your tutorial too...your watering can is amazing!@
Fabulous idea for the IHP card--love how you used the octagon to mirror the honeycomb shape in the paper. Great tutorial, too.
I love this stamp set and your cards are just beautiful and thanks so much for the tutorial.
Oh My Word Loretta! You are truly an amazing artist!!! This last tutorial you gave is just perfect! Gorgeous cards, beautiful coloring!
Your card is beautiful. Thanks for the tutorial.
like the sweet touch of the ice cream card, too cute!
Love the watering can card, the coloring is so pretty, neat to see how you did it!
Oh my gosh Loretta, this is STUNNING! You are really SO talented and do such beautiful work!
Post a Comment